Picking between a herringbone subway tile backsplash and a stacked bond subway tile backsplash feels deceptively simple until you realize how dramatically each one shifts your kitchen’s personality. Same rectangular tiles, wildly different results—one injects movement and upscale flair, the other offers streamlined contemporary sophistication. Getting clear on which subway tile patterns for kitchen backsplash installations actually work for your cooking habits, design sensibility, and wallet matters more than jumping on whatever’s trending.
We’re cutting through the confusion here: visual dynamics, what installation actually entails, grout decisions that matter, and honest cost breakdowns so you can land on the best subway tile layout for kitchen backsplash projects with zero buyer’s remorse. First things first—let’s skip the fluff and figure out which pattern actually solves your design problem in the next sixty seconds.
Herringbone vs Stacked Subway Tile: Quick Decision Guide (Pick in 60 Seconds)
Sure, there’s a universe of tile layouts out there (okay, maybe not a universe, but close!), yet zeroing in on herringbone versus stacked bond cuts through the paralysis. These two patterns serve completely different purposes, and matching one to your kitchen goals? Nearly foolproof once you know what you’re after.
Best match by kitchen style (fast mapping)
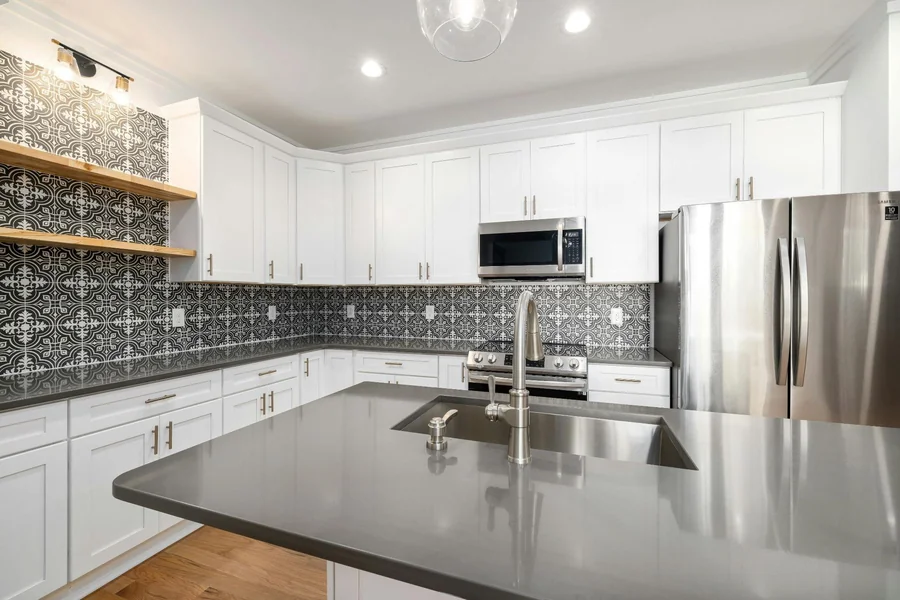
Modern or minimalist spaces naturally gravitate toward stacked bonds, particularly with razor-thin grout joints and precision-cut edges that celebrate geometry. A white subway tile backsplash acts as a crisp, timeless anchor, enhancing the clean lines of the space. Transitional kitchens play both sides—your countertop pattern and cabinet detailing should guide you.
Farmhouse or classic kitchens often embrace herringbone vs stacked subway tile patterns for added warmth, though stacked bonds using artisan-style tile creates lovely softness too. Now that your pattern preference is crystallizing, let’s
Choose a herringbone subway tile backsplash when…
You’re craving texture and dynamism but don’t want to mess with color or exotic materials. The zigzag geometry brings life to basic white tiles using nothing but layout. It shines behind ranges or hoods where that extra visual punch feels deliberate, not chaotic.
Your kitchen deserves that custom design vibe even on a standard budget—herringbone transforms ordinary subway tile into something that whispers high-end without screaming it.
Choose a stacked bond subway tile backsplash when…
You need a serene, structured grid that won’t fight for attention. Stacked bond reads orderly and composed, especially valuable when your countertops already have bold veining or patterns doing the heavy lifting. You’ll also dodge complicated planning headaches and usually face lower installation risk since this layout means fewer tricky angled cuts and simpler execution. It’s your safe harbor for rushed timelines or brave DIY projects. Dig into how each one actually reshapes your kitchen’s atmosphere and spatial perception.
Visual Impact Differences That Matter in Real Kitchens
Pattern selection goes way beyond aesthetics—it fundamentally alters how your kitchen feels moment to moment.
Pattern energy and focal points (movement vs calm)
Herringbone generates diagonal momentum that guides the eye on a journey, whereas stacked bond registers as grounded and balanced. Wall-to-wall herringbone can electrify your entire kitchen, but cramped spaces risk feeling chaotic. Stacked bond functions as a quiet canvas across expansive areas, letting your cabinets and stone do the talking. Behind cooking surfaces, herringbone claims the spotlight as an intentional feature. Near open shelving or breakfast bars, stacked bonds maintain visual order.
Making small kitchens look bigger (scale + direction)
According to The Tile Shop, the large-format version of these tiles (categorized as any tile with a side longer than 15″ and available in sizes up to 48″ x 48″) requires fewer grout lines, making small spaces feel more expansive and cohesive. Vertical stacked arrangements can trick the eye into reading higher ceilings, while horizontal runs stretch narrow galley layouts wider.
Herringbone risks overwhelming tight quarters unless you upsize the tile, match your grout closely, or confine it to a compact accent zone. Directionality is everything—diagonal herringbone expands visual boundaries, but fragments wall surfaces when overused.
Lighting and reflectivity (the overlooked variable)
Glossy finishes under task lighting behave differently based on your pattern choice. Stacked bond delivers neat, uniform reflections that feel crisp and intentional. Herringbone scatters light across angled planes, creating dimensional shimmer. Always mock up a sample board under your kitchen’s actual bulb temperature—2700K warm white, 3000K neutral, or 4000K cool white—because grout joints and pattern angles read completely differently under each spectrum. Grasping how patterns manipulate perception is valuable, but strategic placement in your actual kitchen determines whether your design sings or stumbles.
Best Subway Tile Layout for Kitchen Backsplash by Kitchen Feature
Smart zoning means you can actually enjoy both patterns without creating visual chaos.
Behind the range: the feature panel approach
Countless professionally designed kitchens maintain stacked bonds everywhere except the cooking zone, where herringbone becomes the hero. This establishes a purposeful focal point without swamping the room. Signal the transition deliberately using pencil trim, Schluter profiles, or a slim stone ledge—it should read intentional, never accidental.
Full-wall backsplash (counter to cabinets)
Stacked bond excels as a full-wall solution when you want uninterrupted, sleek surfaces that defer to other finishes. Herringbone across entire walls can absolutely stun, but demands thoughtful execution—wider grout in coordinating tones prevents pattern fatigue. When you’re designing a white subway tile backsplash, cohesion often means light gray or soft off-white grout so the expanse reads unified instead of visually fragmented.
Around windows, outlets, and open shelving
Stacked bond offers easier cuts and cleaner outlet integration, especially when you position electrical boxes along grout lines. Herringbone demands centerline precision at windows or ranges; skip this step, and you’ll battle awkward tile slivers at terminations. Box extenders help align cover plates seamlessly within your pattern. Placement strategy only tells half the story—now let’s tackle the real-world budget and schedule realities that make or break feasibility.
Cost, Labor, Waste, and Timeline: Realistic Planning for Both Patterns
Installation complexity scorecard (DIY vs pro)
Stacked bond demands accuracy for straight runs—grab a tile leveling system to prevent wavy courses. Herringbone needs extra upfront layout and meticulous spacing at every intersection, meaning you want a skilled installer. Most professionals charge by square footage, but intricate patterns like herringbone often trigger hourly rate bumps or flat complexity premiums.
Tile overage and material planning (avoid under-ordering)
Herringbone demands additional overage—budget 15–20% extra because of diagonal cuts and alignment finessing. Always purchase surplus from the identical dye lot; shade drift between production runs shows up noticeably.
Labor cost drivers (what installers actually charge for)
Increased cuts, extended layout time, edge detailing, and multiplied grout joints all inflate labor expenses. Intricate herringbone near corners and electrical boxes requires strategic planning to conceal tiny triangular pieces. Build this into your budget if your kitchen bristles with outlets or awkward junctions.Even flawless installation can look amateurish if your grout approach contradicts the design intent—this next decision impacts both aesthetics and long-term upkeep.
Grout Strategy That Upgrades the Look (and Cleaning) for Both Patterns
Grout color outcomes (blend vs contrast)
Herringbone with tonal grout creates a sophisticated texture without visual clutter; contrasting grout makes a strong geometric declaration. Stacked bond with subtle contrast emphasizes the contemporary grid beautifully—perfect for minimal aesthetics. White tiles with charcoal grout can look striking or exhausting depending on your pattern selection.
Grout line size guidelines (visual + maintenance)
Narrow joints suit precision-cut porcelain; slightly wider spacing works better for a handcrafted-look ceramic. More grout lines in herringbone translate to more sealing and scrubbing down the road, especially for households that cook frequently.
Best grout types for kitchen backsplashes (durability + stain resistance)
Cementitious grout stays affordable but needs periodic sealing. Epoxy grout fights stains impressively and makes sense for pale grout in high-cooking environments. Single-component formulas offer convenience but limited color ranges. While grout enhances your pattern, the tile itself—finish, edge treatment, and dimensions—can make herringbone look disjointed or stacked bonds feel cheap with poor choices.
Tile Selection Rules That Change the Final Result (Not Just the Pattern)
Tile finish and edge type (handmade-look vs rectified)
Stacked bond amplifies imperfections—rustic edges can read charmingly organic, but only when planned. Herringbone naturally camouflages minor inconsistencies and adds dimension even with standard tile.
Tile size beyond 3×6 (trend-forward options)
Sizes like 2×8, 3×12, 4×16, and micro-subway offer creative flexibility. Oversized subway formats minimize grout lines; micro versions work best as accents to prevent visual overload.You’ve nailed your tile selection; now the gap between a $10,000 look and a $30,000 look comes down to these precision moves that professionals religiously use.
Precision Layout Tips for a Cleaner, More Expensive Look
Centerline planning (the pro move)
Center your herringbone V on the range or sink. For stacked bonds, center your grid on architectural focal points to dodge narrow slivers at boundaries—this single decision separates amateur from professional work. Mastering fundamentals unlocks sophisticated design territory—here’s where herringbone and stacked bonds get genuinely creative without veering into fleeting trend territory.
Trend-Forward Combinations Competitors Don’t Cover
Mixed-layout zoning (the two-pattern backsplash)
Consider the stacked bond as your perimeter workhorse with herringbone spotlighting the range. Insert a narrow break strip in stone or metal to signal the transition was designed, not improvised.
Your Questions About Subway Tile Patterns, Answered
1. Is herringbone subway tile backsplash going out of style, or is it still timeless?
Herringbone endures when executed in neutral palettes and classic materials. It’s a design upgrade that matures gracefully, unlike flash-in-the-pan patterns that date fast.
2. Does a stacked bond subway tile backsplash look too modern for a traditional kitchen?
Not at all—pairing stacked bond with artisan-look tile or generous grout softens the grid and harmonizes with traditional aesthetics beautifully.
3. Which is cheaper: herringbone or stacked bond subway tile installation?
Stacked bonds typically cost less thanks to simpler cuts and quicker layout. Herringbone’s intricacy increases labor hours and material waste, pushing overall project costs higher.
Making Your Final Pattern Decision
Your decision between herringbone and stacked bond ultimately reflects how you want your kitchen to feel—animated or peaceful, layered or clean-lined. Both patterns deliver when properly matched to your space, lighting conditions, and daily life. Stacked bond brings contemporary clarity with reduced labor complexity, while herringbone offers designer dimension without boutique materials. Don’t let endless options freeze you—start with these two battle-tested layouts, test samples under your kitchen’s actual lighting, and listen to your gut. The best backsplash is the one you’ll genuinely love encountering every single morning.

